Overview
This article explains how to configure update.connector.graph to synchronize Microsoft 365 (Exchange Online) data with Aurea CRM using Microsoft Graph. This is the recommended approach for Microsoft 365 environments because it avoids per-user passwords and supports tenant-wide access via an Entra (Azure AD) app registration.
Before you begin
- You will need:
- Aurea CRM 15.x or newer
- At least one licensed Exchange Online mailbox
- An administrator who can access Microsoft Entra admin center (to create an app registration and grant consent)
- Access to your ACRM server where the Graph connector is installed/configured
Part A : Microsoft Entra (Azure AD) setup
Step 1: Register an application
1. Open the Microsoft Entra admin center.
2. Go to Identity → Applications → App registrations.
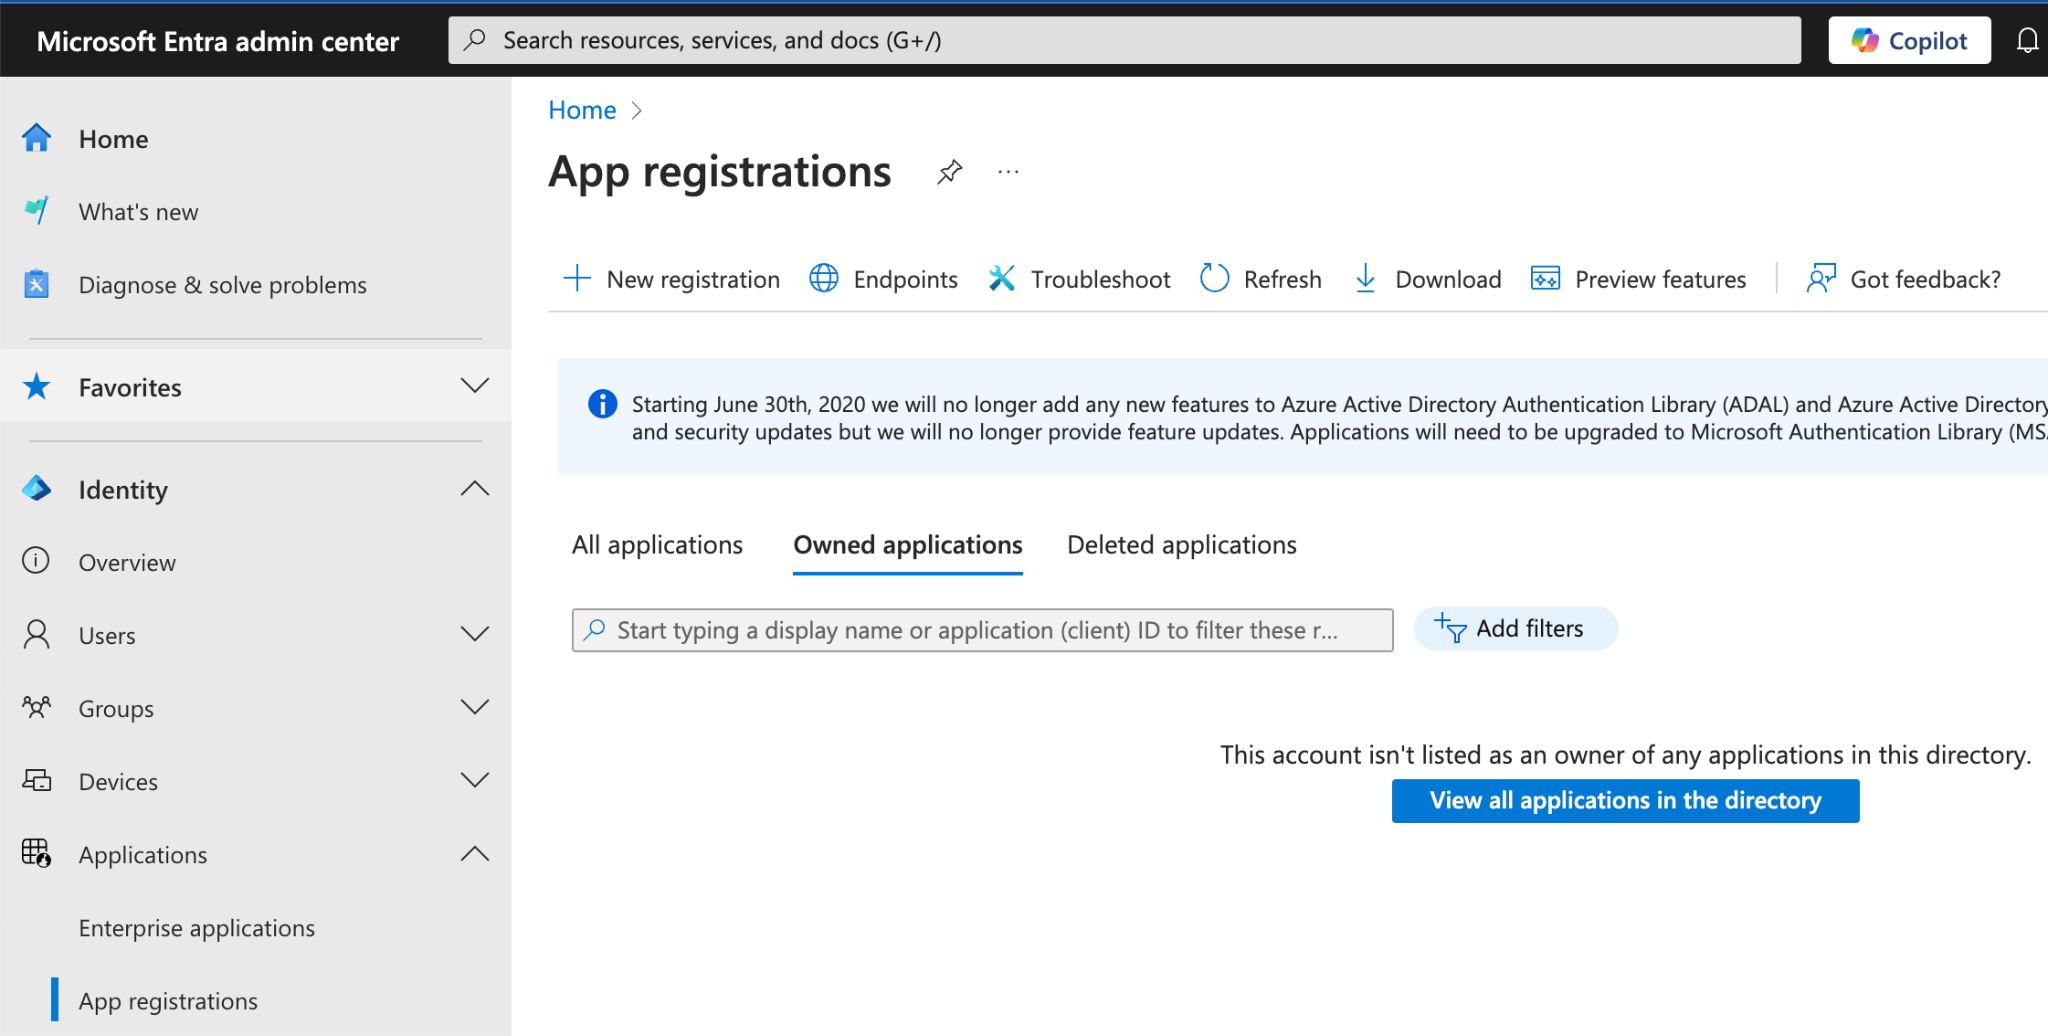
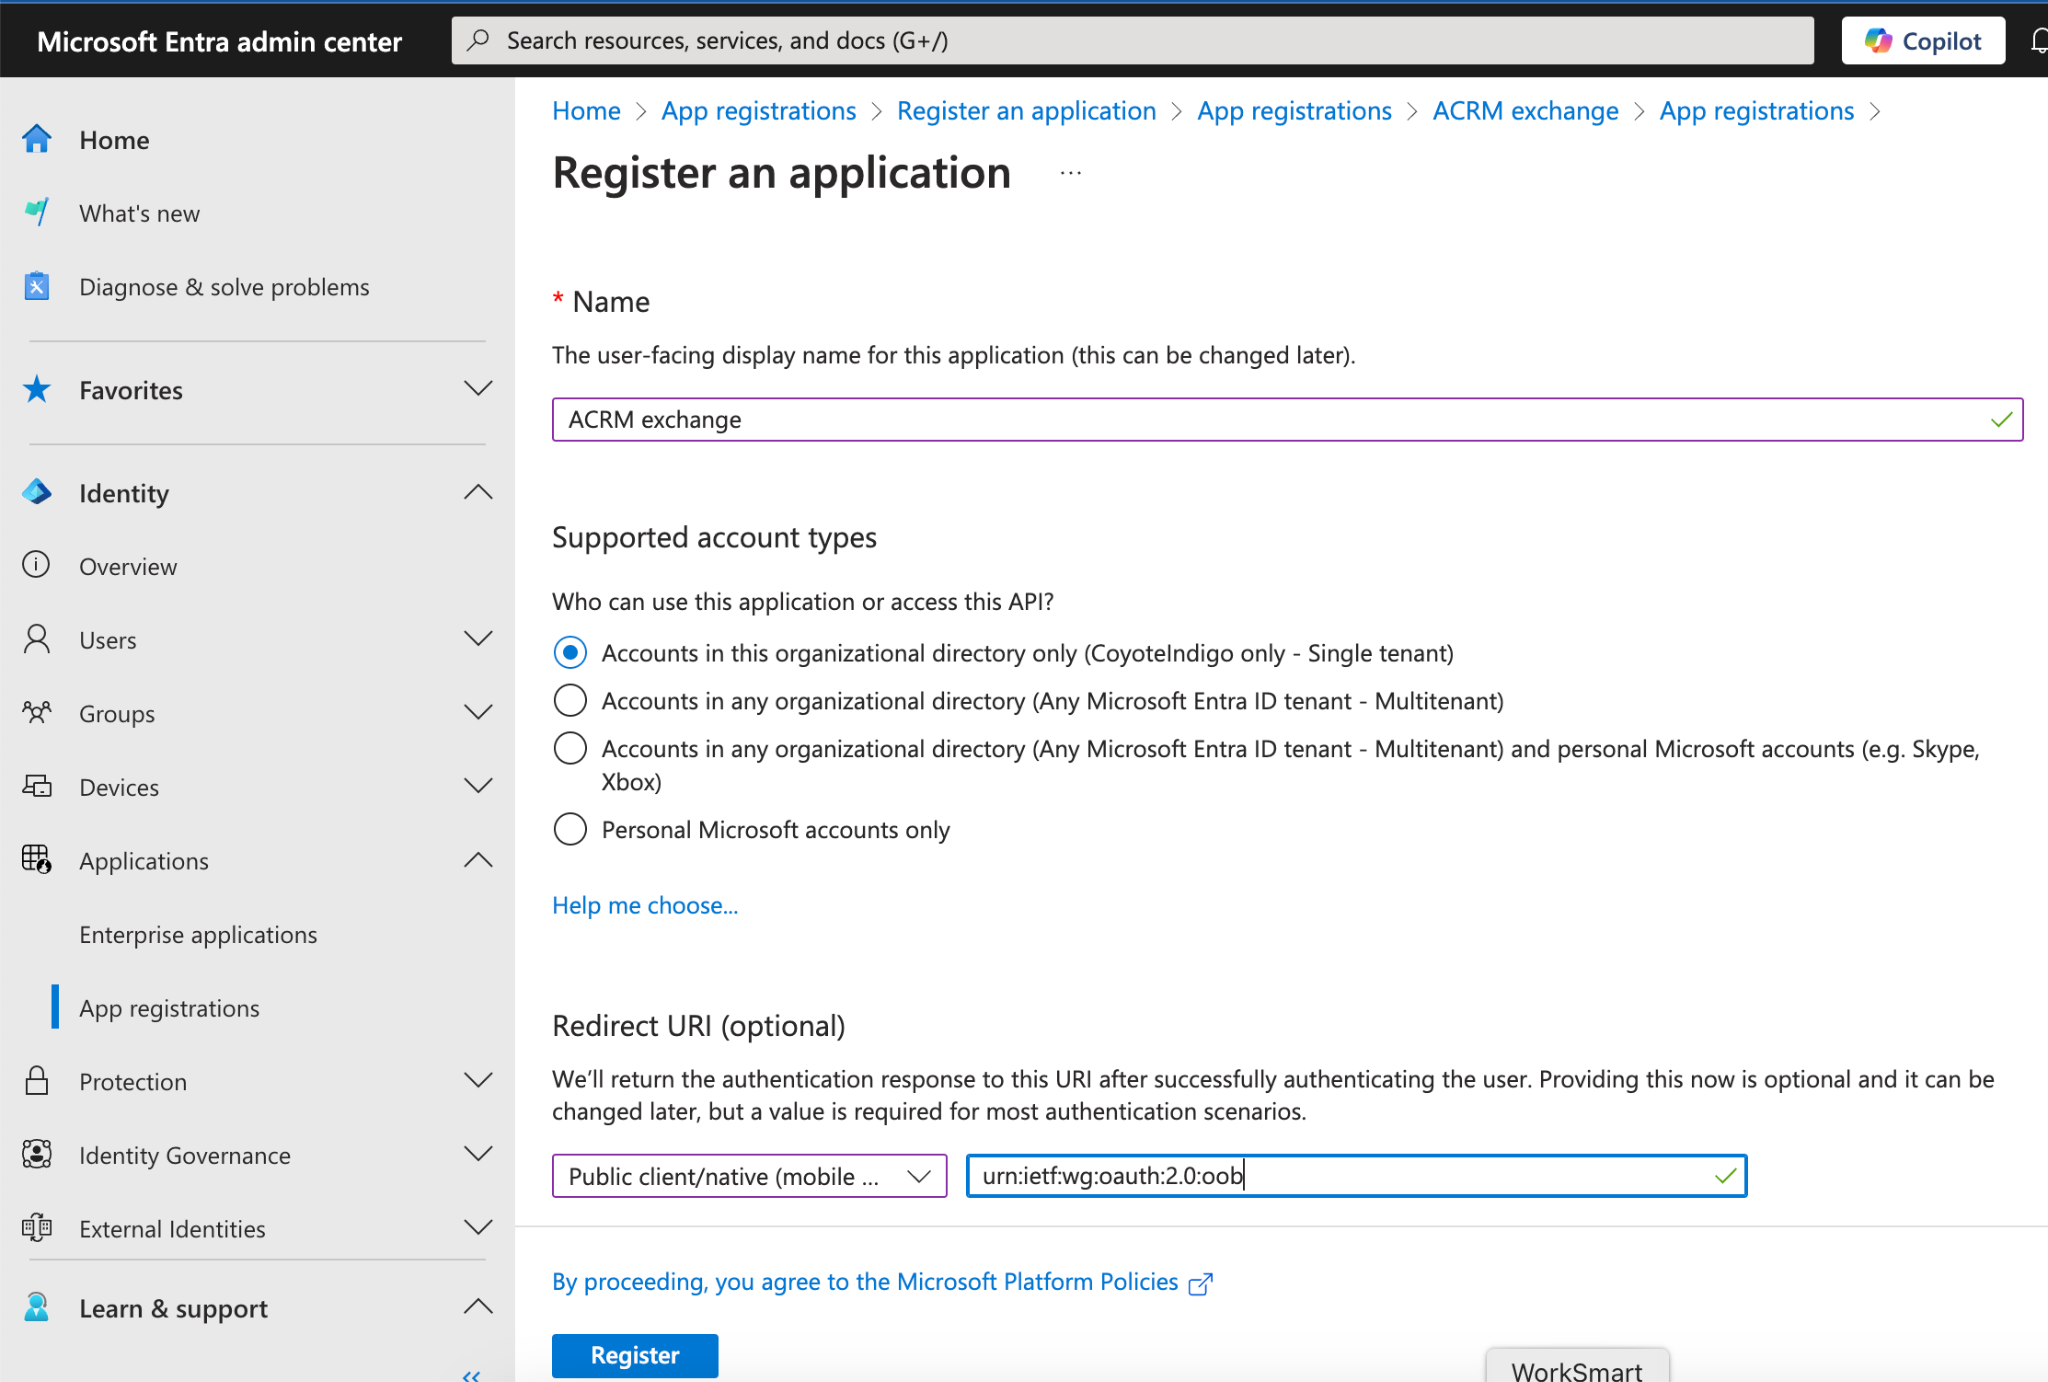
3. Select New registration.
4. Enter:
- Name: e.g., AureaCRM Graph Connector
- Supported account types: typically Single tenant (most common)
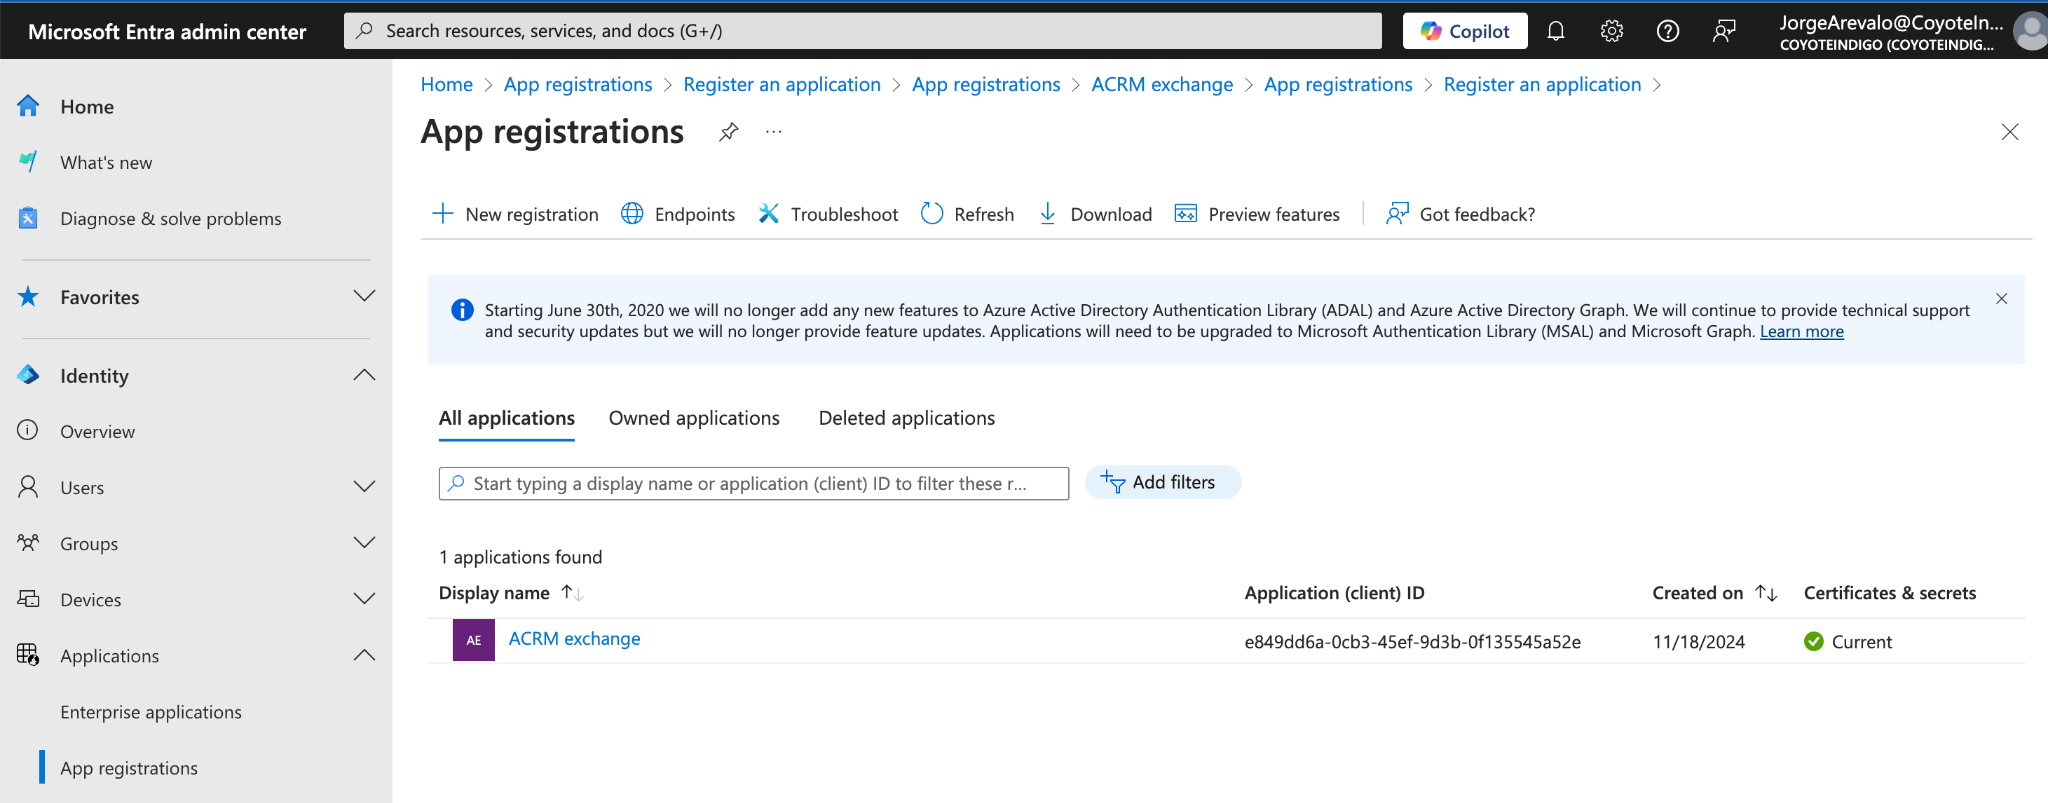
5. Select Register.
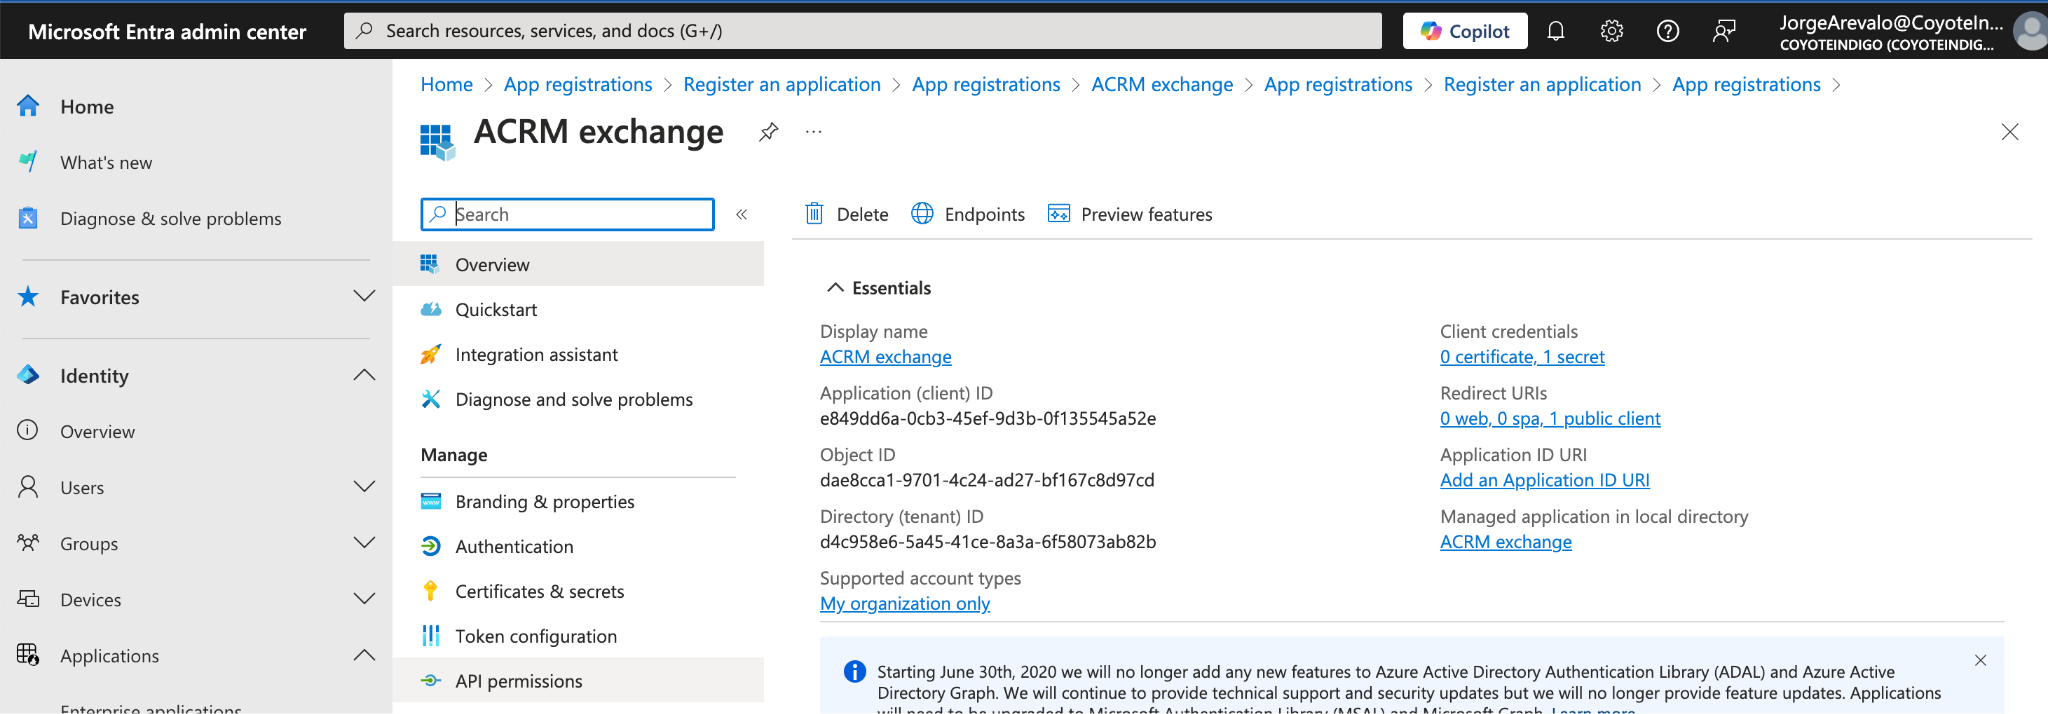
6. Record these values (you will use them later):
- Application (client) ID
- Directory (tenant) ID
Note: For client-credentials (server-to-server) scenarios, a Redirect URI is typically not required.
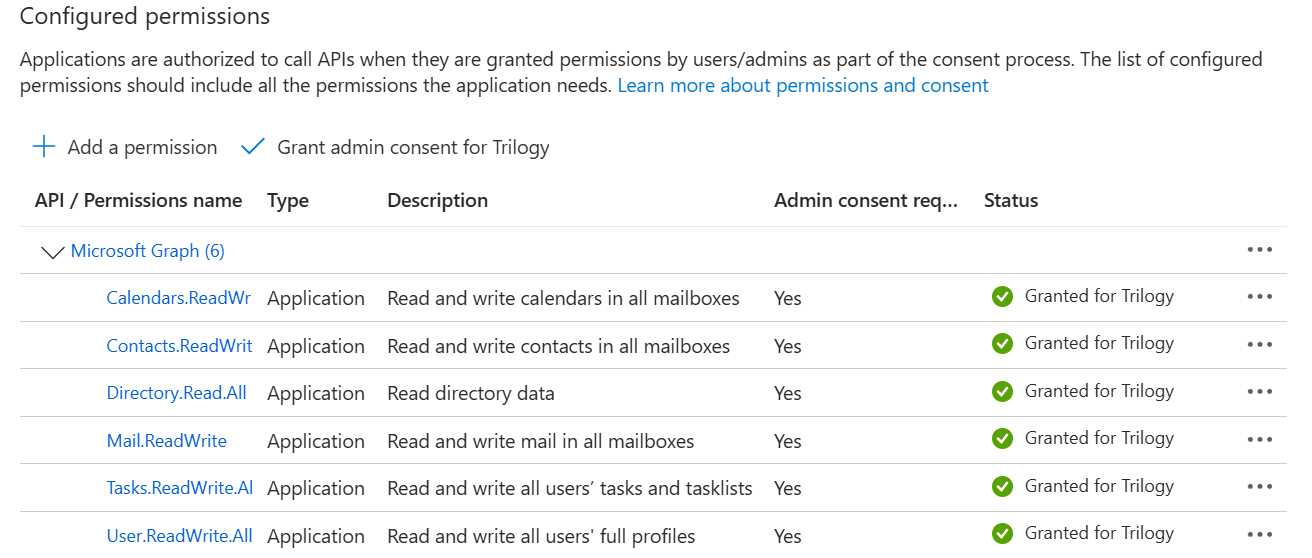
Step 2: Add Graph API permissions
1. In the App Registration, go to API permissions → Add a permission.
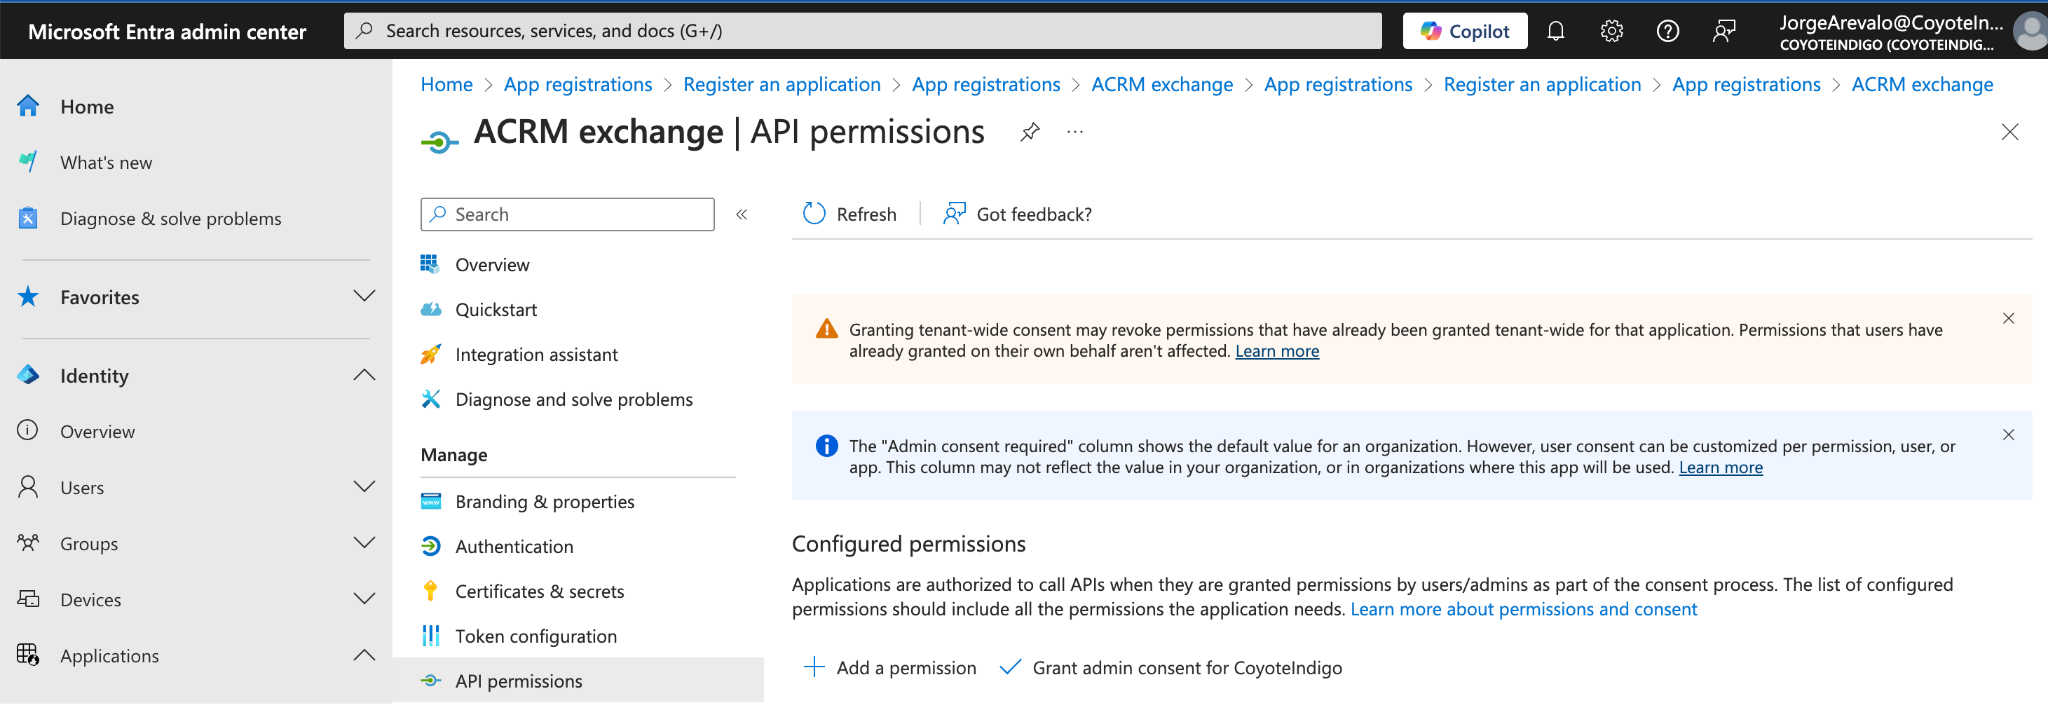
2. Choose Microsoft Graph and add Application permissions (tenant-wide):
- Calendars.ReadWrite
- Contacts.ReadWrite
- Directory.Read.All
- Mail.ReadWrite
- Tasks.ReadWrite.All
- User.ReadWrite.All
3. Select Grant admin consent and confirm.
Security note (recommended for customers): Review these permissions with your security/Entra admin team. Use a dedicated app registration for this connector and restrict who can manage it.
Step 3: Create a client secret
1. Go to Certificates & secrets → New client secret.
2. Add a description and choose an expiration period aligned with your security policy.
3. Copy and securely store the secret value immediately.
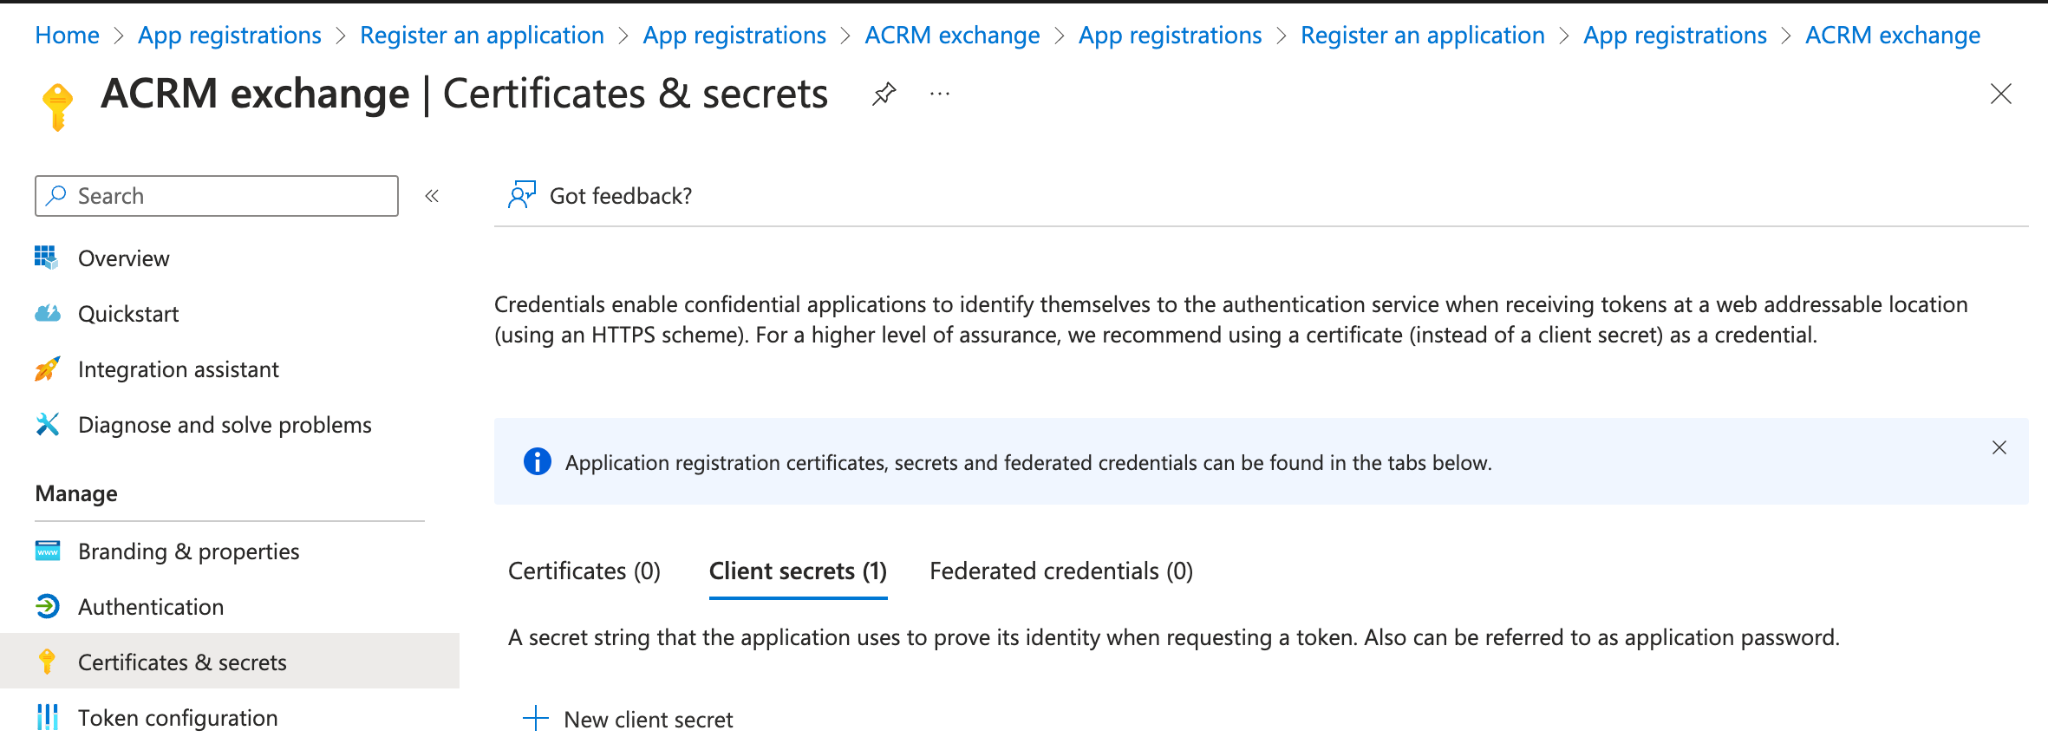
You cannot retrieve the secret value again later. If it’s lost, you must create a new secret and update the connector configuration.
Part B : Configure Aurea CRM
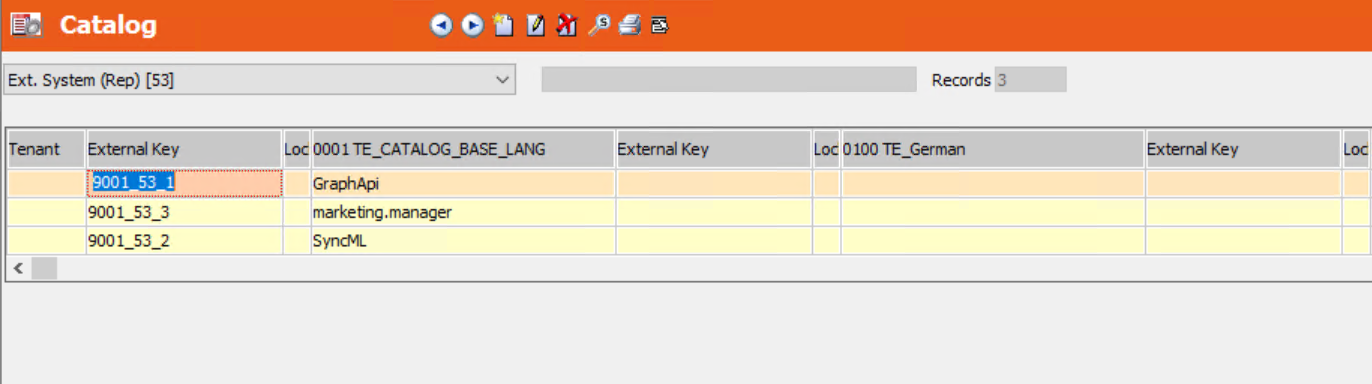
Step 1: Confirm required catalog values exist
In the Data Model module, ensure the following catalog entries exist.
Catalog: Content Type (groupware) (ExternalKey) Add (if missing):
- application/x-mmRecord
- text/x-mmAbsences
- text/x-mmPerson
- text/x-mmTasks
- text/x-vevent
Catalog: Ext. System (Rep) Add (if missing):
- marketing.manager
- GraphApi
- SyncML

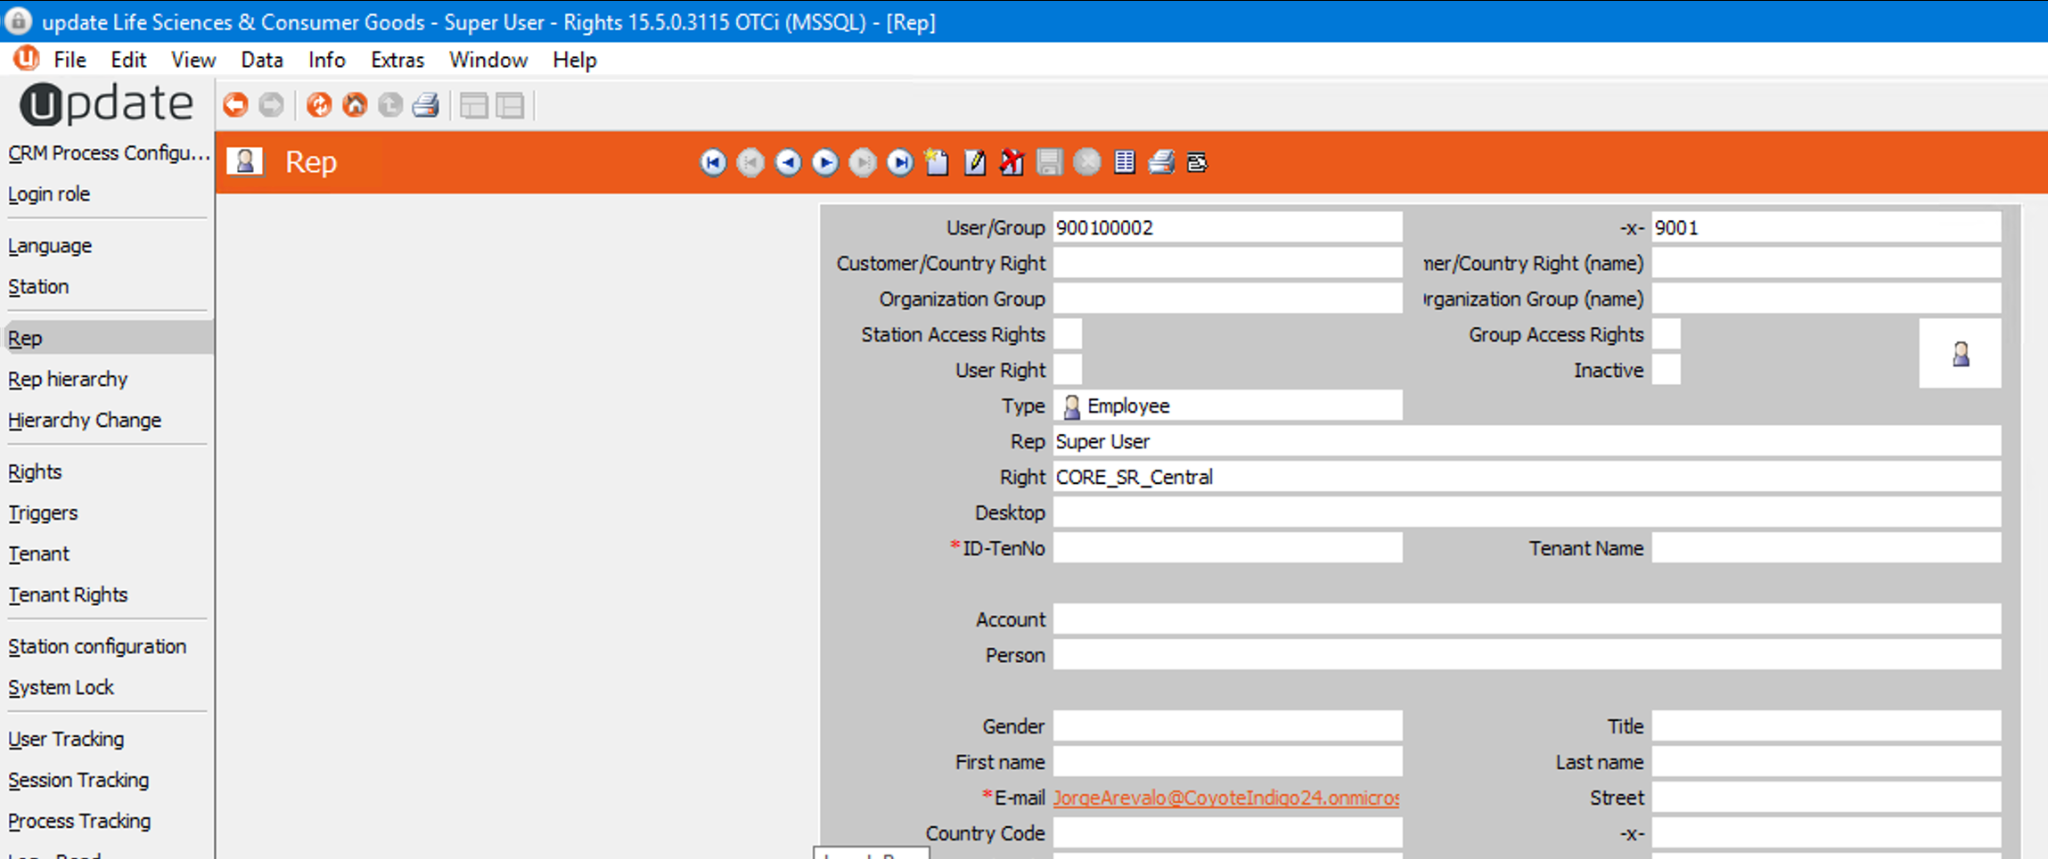
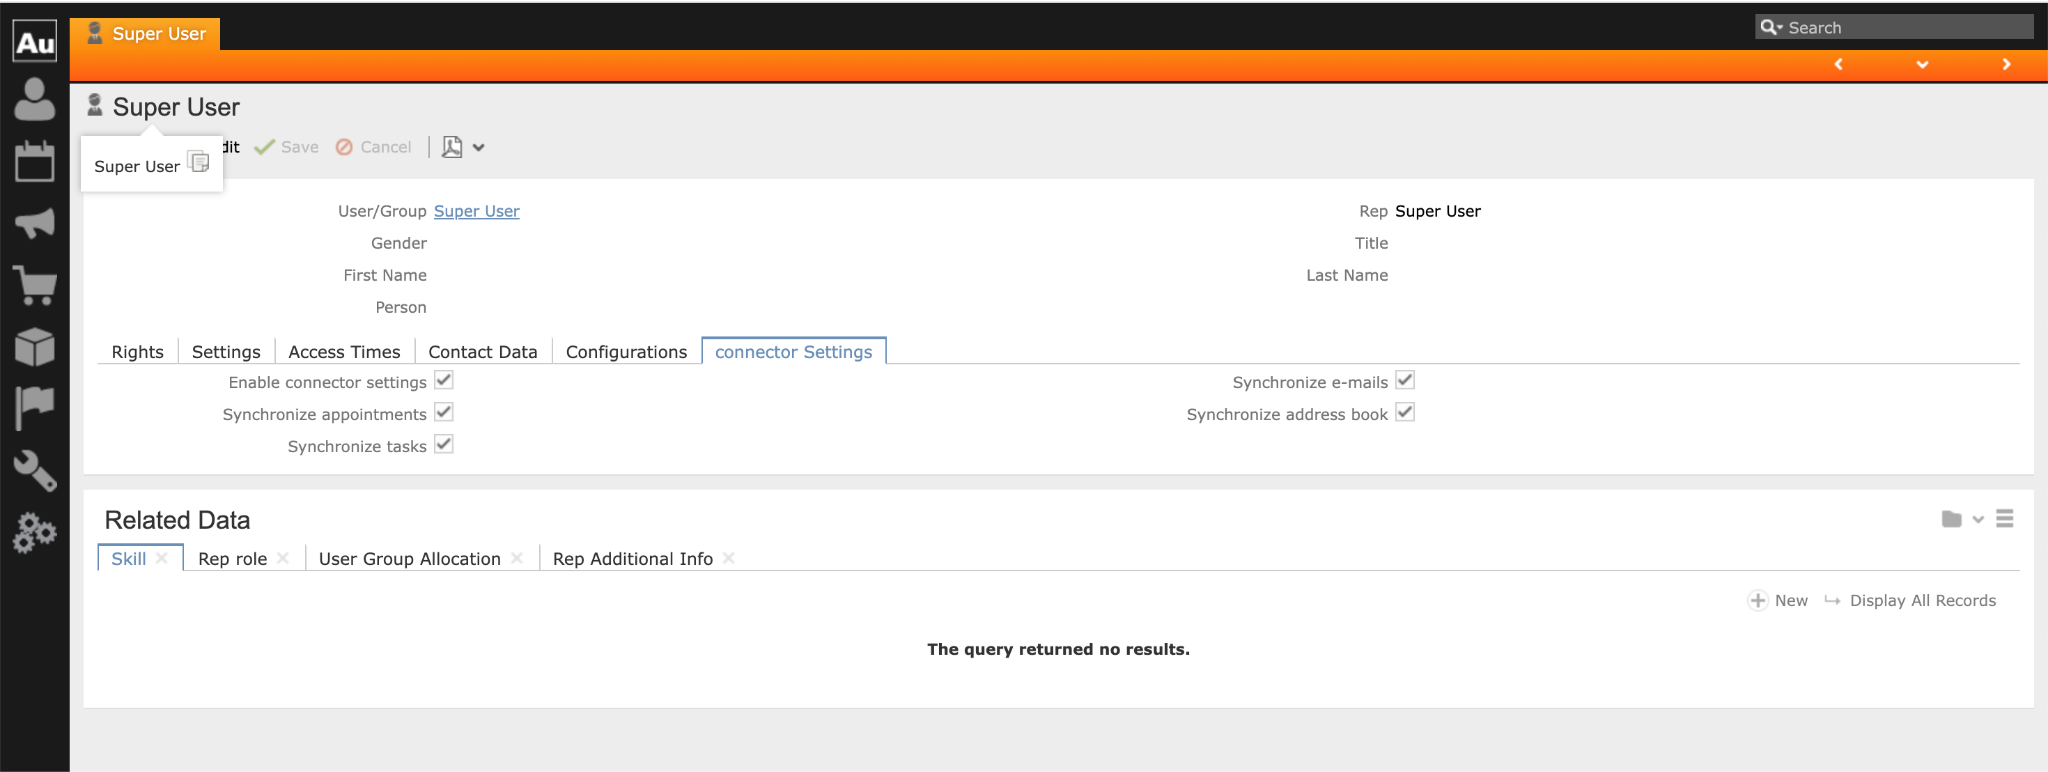
Step 2: Enable synchronization for the required users (Reps)
The connector synchronizes only the mailboxes for users who are enabled for connector sync in Aurea CRM.
1. In CRM.Web, open the Rep/User administration area.
2. Set the user’s Enable Connector settings flag (or equivalent connector enablement option).
3. Repeat for each mailbox user that should be synchronized.
The connector refreshes the user/mailbox list periodically (commonly once per day), depending on your connector configuration.

Step 3: Update CRM.Interface authentication configuration
To allow Graph connector authentication through CRM.Interface, add the GraphApi master user entry in your forms.xml.

1. Locate your CRM.Interface configuration file:
- .../Web/system/xml/forms.xml (exact path depends on your installation)
2. In the <authentication> section, add a master user entry for GraphApi (example):
<authentication>
<masterUser client="outlook" login="Principal,ClientID">OCSU</masterUser>
<masterUser client="notes" login="Principal,ClientID">OCSU</masterUser>
<masterUser client="GraphApi" login="Principal,ClientID">OCSU</masterUser>
</authentication>
Also, notice that the if the *Connector* fields are intended to be used, these need to be added to the forms.xml (if they haven't already been added for the previous connector) and notice that the field names may differ between the templates used. Below are the changes for the ISI template.
Event filters:
<SyncHandler type="ExchangeConnector_VeventFilter">
<condition>
<lop value="and">
<cond tablename="Contact" fieldname="ConnectorDeleted" op="!=" value="true"/>
</lop>
<lop value="and">
<cond tablename="Contact" fieldname="ConnectorPublished" op="!=" value="true"/>
</lop>
</condition>
</SyncHandler>
Event deletion:
<options>
<vevent>
<!-- missing attendees will be append to the textfield or written in a seperate field -->
<!-- possible values for mode are replace and append -->
<!-- Without email_seperator the adresses will be written linewise, if the tag exist they will be written in one line -->
<missing_attendees>
<Contact>
<ConnectorMissingparticipants>true</ConnectorMissingparticipants>
</Contact>
<summary>
<field fieldname='MissingParticipants' mode='replace'/>
<!--field fieldname='Text' mode='append'/--> <!-- SN some customers prefer the use of the default text field, so just put it disabled ready for user -->
<!--<separator></separator>-->
<header lang='en'>Unassigned participants:</header>
<required lang='en'>To: </required>
<optional lang='en'>CC: </optional>
<informational lang='en'>BCC: </informational>
<unknown lang='en'>Unknown: </unknown>
<header lang='de'>Fehlende Teilnehmer:</header>
<required lang='de'>To: </required>
<optional lang='de'>CC: </optional>
<informational lang='de'>BCC: </informational>
<unknown lang='de'>Unbekannt: </unknown>
<email_separator>, </email_separator>
</summary>
</missing_attendees>
<!-- Customised - Deletion from Outlook to update -->
<!-- Customised: Deactivated, as not used for connector-->
<!--This line enables the deletion event to work with the sync process -->
<key name='delete_sync_process_410' value='true'/>
</vevent>
</options>
Contact events:
<form type='vevent'>
<table tablename='Contact'>
<field fieldname='StatNo'/>
<field fieldname='SeqNo'/>
<field fieldname='CoGrp'/>
<field fieldname='CoNo'/>
<field fieldname='PeGrp'/>
<field fieldname='PeNo'/>
<field fieldname='Company'/>
<field fieldname='Person'/>
<field fieldname='Contact'/>
<field fieldname='Status'/>
<field fieldname='Date'/>
<field fieldname='Time'/>
<field fieldname='Duration'/>
<field fieldname='Unit'/>
<field fieldname='EndDate'/>
<field fieldname='EndTime'/>
<field fieldname='Subject'/>
<field fieldname='Text'/>
<field fieldname='Priority'/>
<field fieldname='RepID'/>
<field fieldname='Rep'/>
<field fieldname='ContactByID'/>
<field fieldname='ContactBy'/>
<field fieldname='Private'/>
<field fieldname='ParticipantID'/>
<field fieldname='Participants'/>
<field fieldname='Document1'/>
<field fieldname='Document2'/>
<field fieldname='FreeC4'/>
<field fieldname='FreeC5'/>
<field fieldname='FreeC6'/>
<field fieldname='IsMasterContact'/>
<field fieldname='IsSerialContact'/>
<field fieldname='ContactStatNo'/>
<field fieldname='ContactSeqNo'/>
<!-- vertical specific -->
<field fieldname='ProjectsStatNo'/>
<field fieldname='ProjectsSeqNo'/>
<!-- Reminder fields -->
<field fieldname='ReminderDur'/>
<field fieldname='ReminderUnit'/>
<!-- new Cataloge ShowAs -->
<field fieldname='ShowAs'/>
<!-- Customised -->
<field fieldname='OpportunityStatNo'/><!-- Y1 -->
<field fieldname='OpportunitySeqNo'/>
<field fieldname='ConnectorMissingparticipants'/>
<field fieldname='ConnectorPublished'/>
<field fieldname='ConnectorDeleted'/>
<field fieldname='A031Location' />
<!--SN make sure all needed fields are initialized-->
<field fieldname='MissingParticipants'/>
<field fieldname='F5021'/> <!-- New From Connector -->
<field fieldname='Todo'/>
<!-- This field is used for the rich text -->
<field fieldname='F5044' />
<!-- End customisation -->
</table>
3. Restart the CRM web application (for IIS deployments: recycle the application pool) so the change takes effect.
Use the appropriate ACRM “master”/service user for your environment (often OCSU by default).

Step 4: Install the Graph connector
On the connector host/server:
1. Run setup.exe for update.connector.graph
2. Complete the installation wizard
Step 5: Configure ACRM + Entra credentials (users.xml)
1. Open update.users.exe
2. Open the users.xml in the same directory.
3. Update the following entries:
- GraphApi Connector Master: set to your ACRM master/service user (e.g., OCSU)
-
Graph API App Registration:
- Tenant ID
- Client ID
- Client Secret
- Admin email address (password is not required for Graph client-credentials flow)
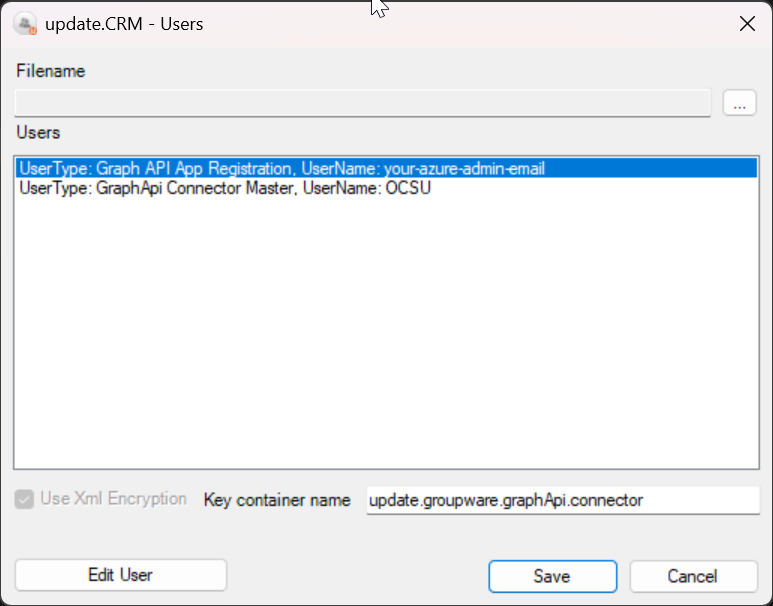
Recommendation: Use a dedicated service account and follow your organization’s secret storage/rotation policy.
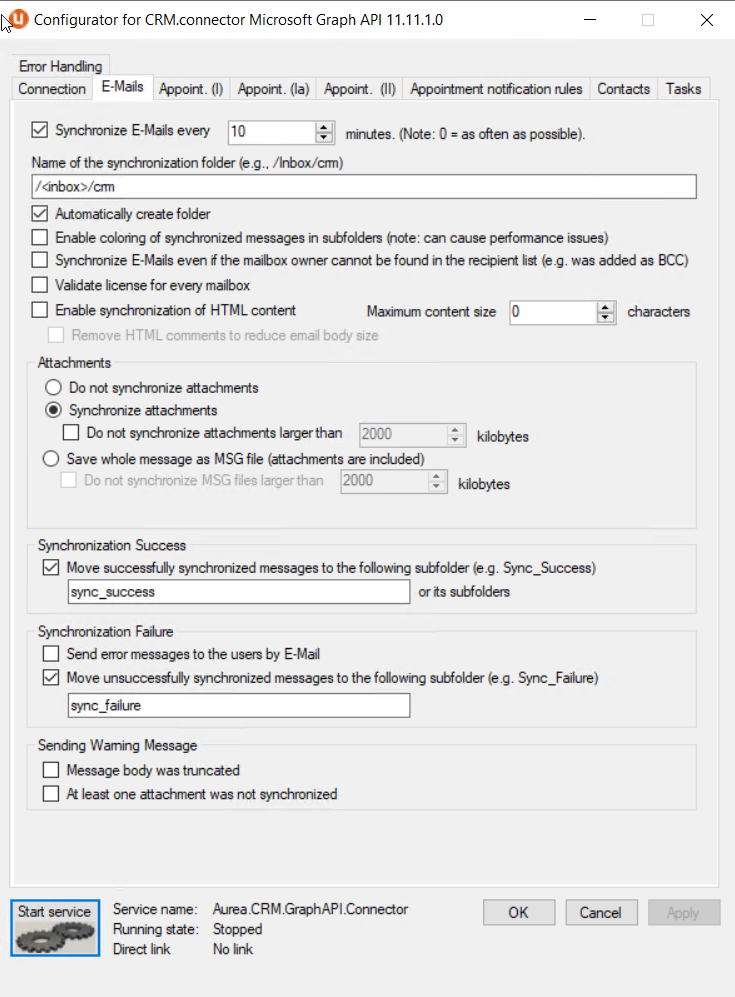
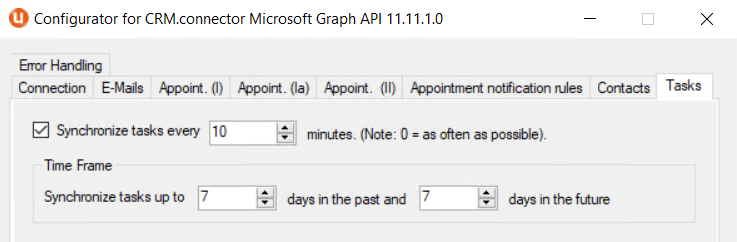
Step 6: Configure the connector (Configurator)
1. Open SynchroConnectorConfigurator.exe in the update.connector.graph installation folder.
2. In Connection:
- Add your Microsoft 365 managed domain(s) (e.g., company.com) without the @
- Set the CRM.Interface URL
- (Optional) Enable automatic mailbox list refresh (commonly once per day)
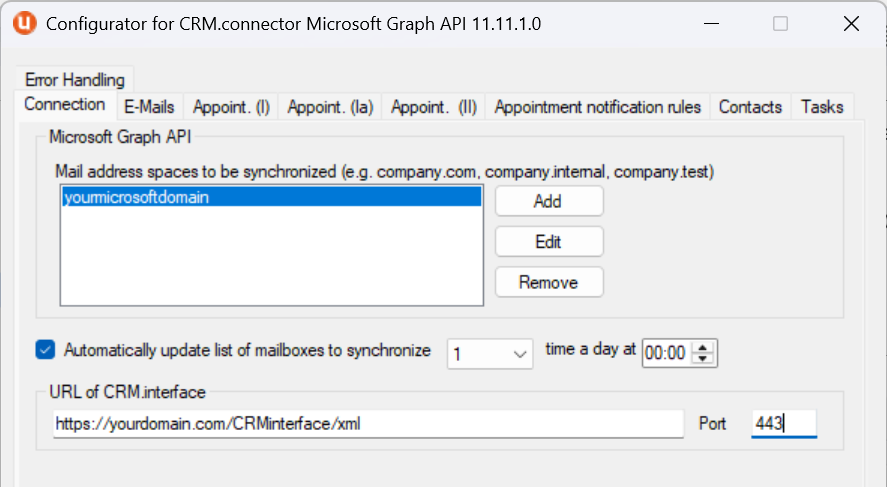
3. Recommended baseline sync settings (adjust to your business needs):
- E-Mails: every 10 minutes
- Appointments: every 10 minutes; timeframe 7 days past / 7 days future
- Tasks: every 10 minutes; timeframe 7 days past / 7 days future
- Contacts: every 1440 minutes (24 hours)
4. Save changes and start the connector service.
Validation checklist
After configuration, verify:
- The connector service starts successfully
- Enabled users in CRM are recognized for mailbox sync
- Email / appointment / task / contact changes in Microsoft 365 appear in Aurea CRM (and vice versa if configured)
- No “permission/consent” errors appear in connector logs
Common issues
- No users are synchronized: confirm the user is enabled for connector sync in CRM and the mailbox exists in Microsoft 365.
- Authentication/consent errors: confirm admin consent was granted and the Tenant/Client IDs + Secret match the app registration.
- Secret expired: create a new secret and update the connector configuration.
-
Duplicated records: due to incompatibilities between the Microsoft EWS and Microsoft Graph APIs, records processed by the previous connector may get duplicated. It is recommended to follow one of these practices:
- Process only new records for a few days so that no old records are processed.
- Remove duplicate records manually.
Csaba Daniel
Comments