Overview
This article provides a step-by-step guide for configuring Single Sign-On (SSO) in Aurea CRM.Web using Microsoft Azure AD and Google OAuth. It outlines the prerequisites, including required builds and optional admin credentials, and details how to register applications in both platforms with appropriate redirect URIs and scopes. The guide then explains how to activate SSO within ACRM by updating the users.xml file with the correct client IDs, secrets, and configuration flags, enabling either or both providers. A final IIS application pool restart is required to apply changes, after which users will see the corresponding SSO buttons on the CRM.Web login screen.
Before you begin
- You will need:
- ACRM.Web build included in the artifacts folder
- ACRM.Designer build included in the artifacts folder
- Optional: Microsoft admin account to configure the Azure Application.
- Optional: Google admin account to configure the Google Project.
Create the Azure Application
- Go to Azure Portal → Entra ID → App registrations → New registration
- Name: CRM Web SSO
- Supported account types: Choose per org policy (Single tenant recommended first)
- Redirect URI (Web): https://<crm-host>/api/Sso/Callback?provider=microsoft
- After creation, copy:
- Application (client) ID
- Directory (tenant) ID
- Go to Certificates & secrets → New client secret
- Create a new secret
- Copy the secret value (store securely)
- Go to Authentication → Configure
- Web redirect URIs include: https://<crm-host>/api/Sso/Callback?provider=microsoft
- Enable ID tokens (checked)
- (Optional) Front-channel logout URL: https://<crm-host>/api/Authentication/Logout
- Navigate to API permissions
- OpenID Connect scopes only (no Graph needed): openid, profile, email
- Admin consent (if required by tenant policy)
Create the Google Project
- Go to Credentials
- In your project: APIs & Services → Credentials
- Click Create Credentials → OAuth client ID
-
Choose application type
- Most common: Web application (for browser → your backend)
- Give a clear name (e.g., CRM.Web SSO)
-
Configure authorized URIs
- For Web application you’ll see two boxes: Authorized JavaScript origins (only needed for front-end using Google Identity Services One-Tap/Popup): https://<crm-host>
- Authorized redirect URIs (required; where Google sends users back with the auth code): https://<crm-host>/api/Sso/Callback?provider=google
- Tip: Redirect URIs must match exactly (scheme, host, path, and trailing slash).
-
Create App Client ID and Secret
- Click Create → you’ll get a Client ID and Client Secret.
- Download JSON if you prefer; otherwise copy them now.
- Use the standard OIDC scopes in your app config:
- openid email profile
Configure SSO in ACRM
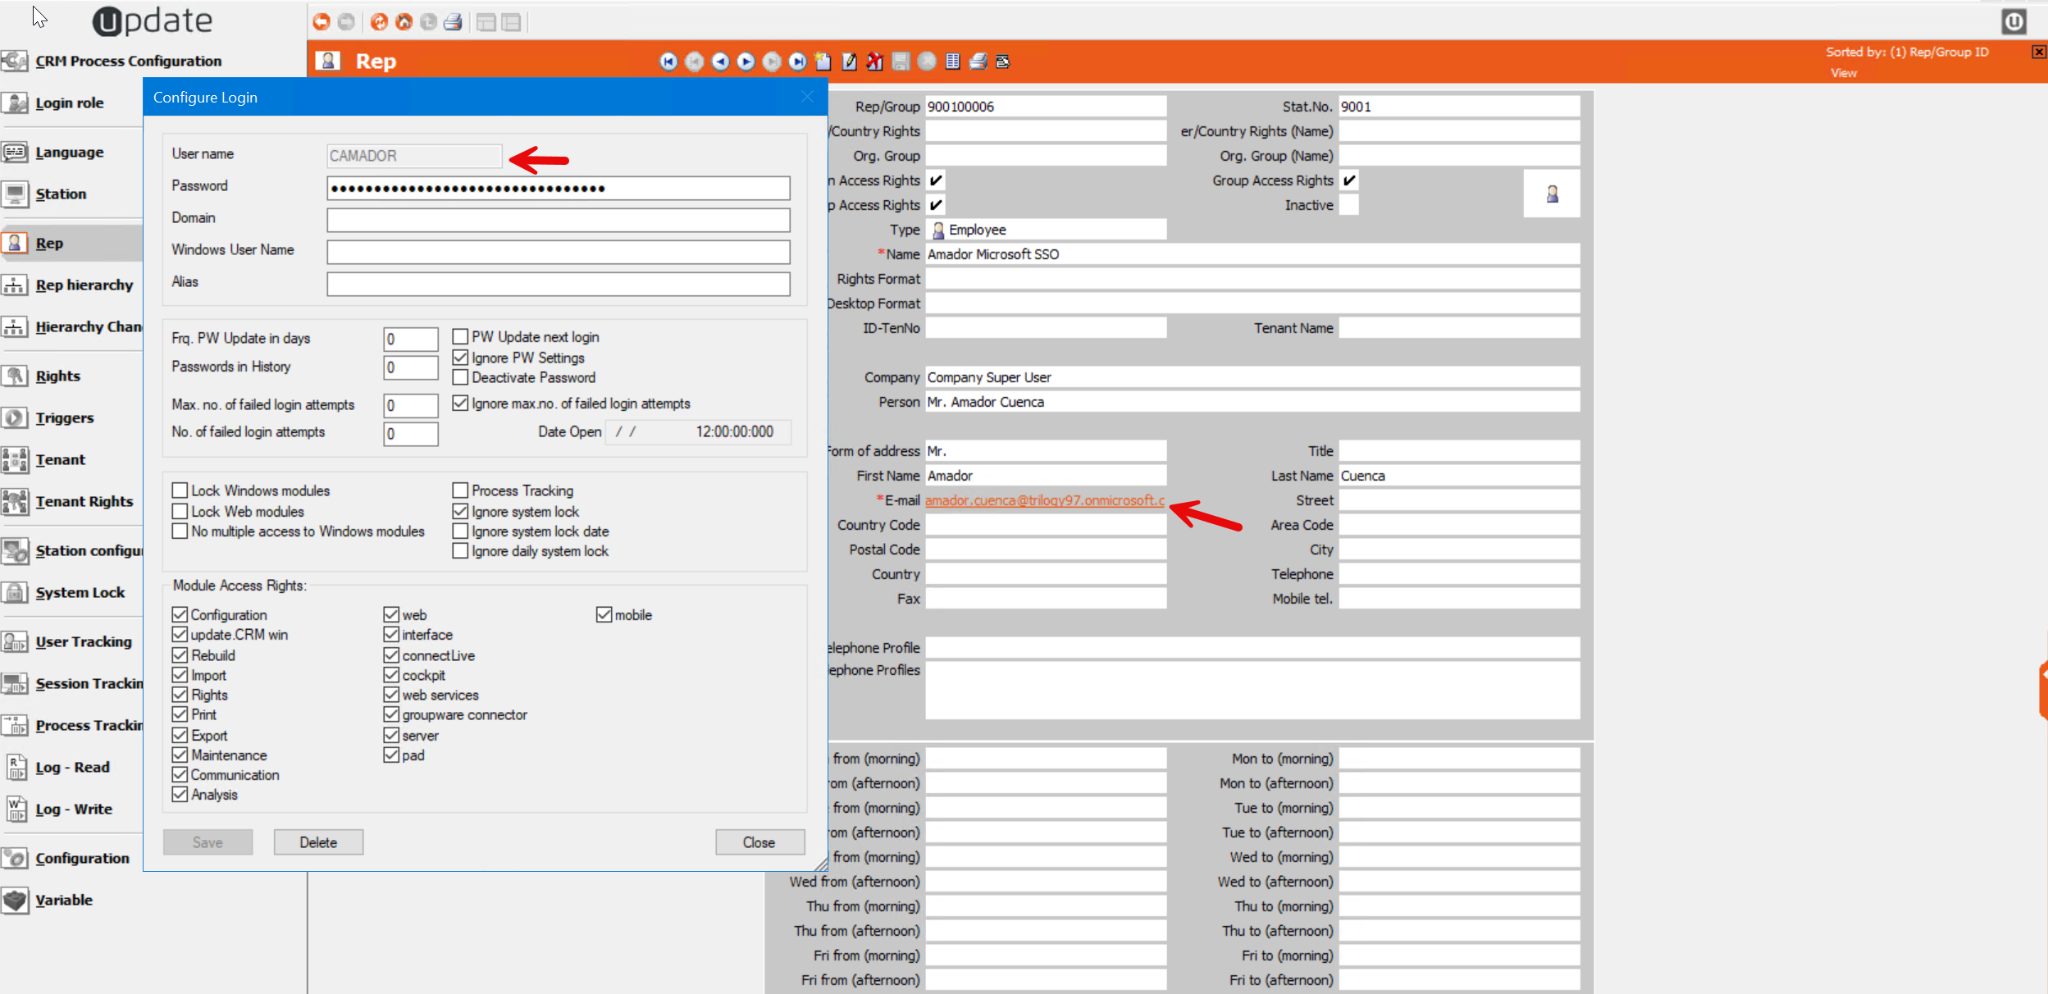
First and foremost, the Rep Email field should be set to the SSO email.The rep should have an user assigned and the authentication and authorization flow will be the same as in standard login/Windows SSO.
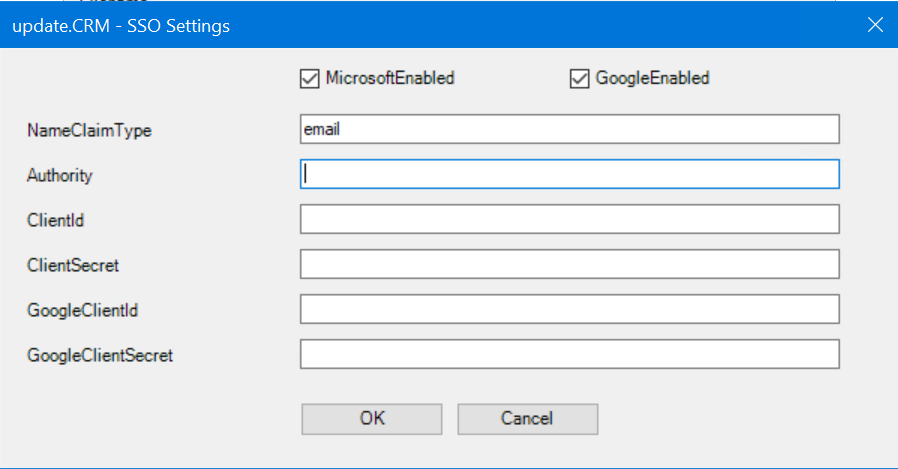
SSO has been integrated into ACRM.Web and can be configured easily by just updating the users.xml file using the update.users.exe in the web/bin folder.
|
Name |
Type |
|
|
MicrosoftEnabled |
boolean |
true or false |
|
GoogleEnabled |
boolean |
true or false |
|
NameClaimType |
string |
|
|
AzureAdAuthority |
string |
https://login.microsoftonline.com/{TenantId} |
|
AzureAdClientId |
string |
Client Id from the Azure app |
|
AzureAdClientSecret |
string |
Client Secret value from the Azure app |
|
GoogleClientId |
string |
Client Id from the Google project |
|
GoogleClientSecret |
string |
Client Secret from the Google project |
Notice that we do not need to configure both, we can opt to configure Microsoft, Google or both. But if we configure one and mark the checkbox, we have to provide all values otherwise the validator will fail in runtime and the SSO buttons won’t appear in the login screen.
After modifying the users.xml it is required to restart the CRM.Web Application Pool in IIS.
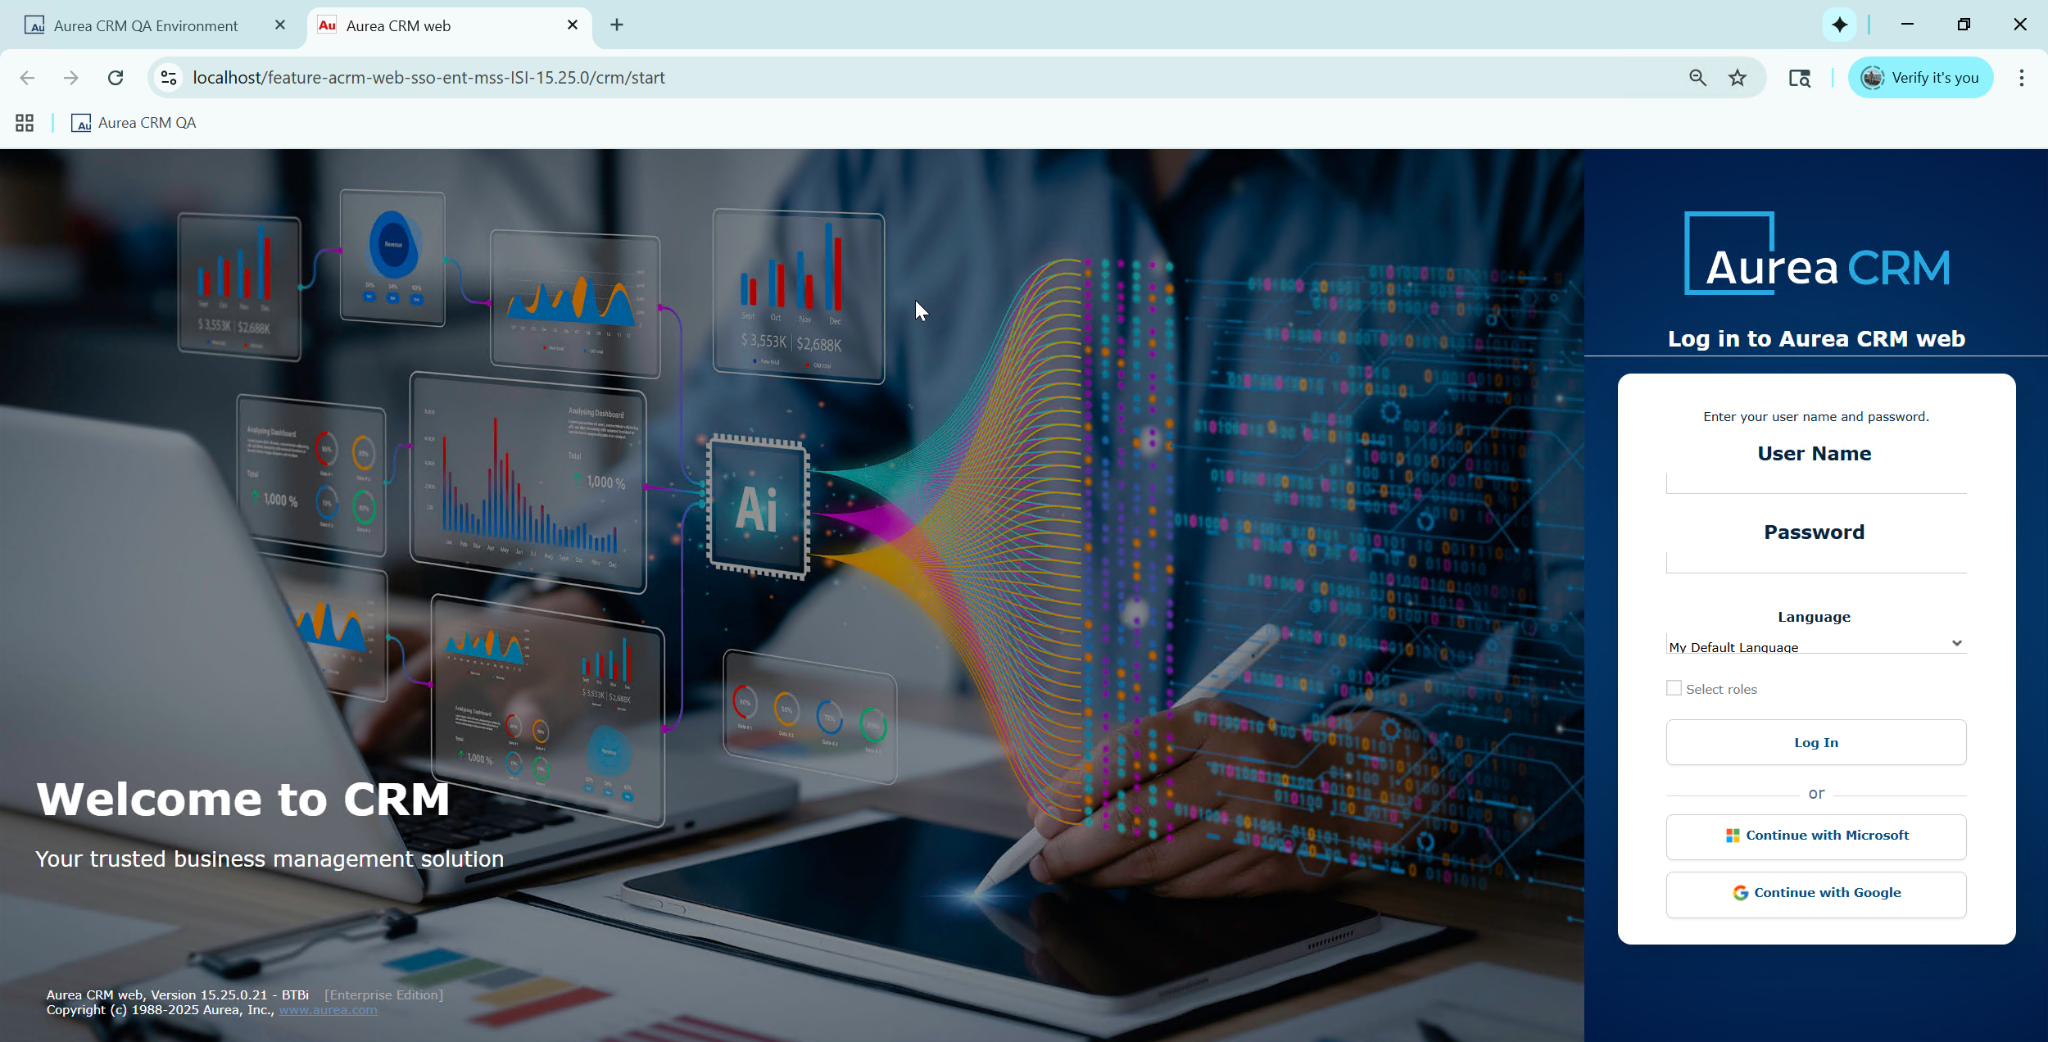
This is the modern theme login screen:
And this is the standard update login screen:
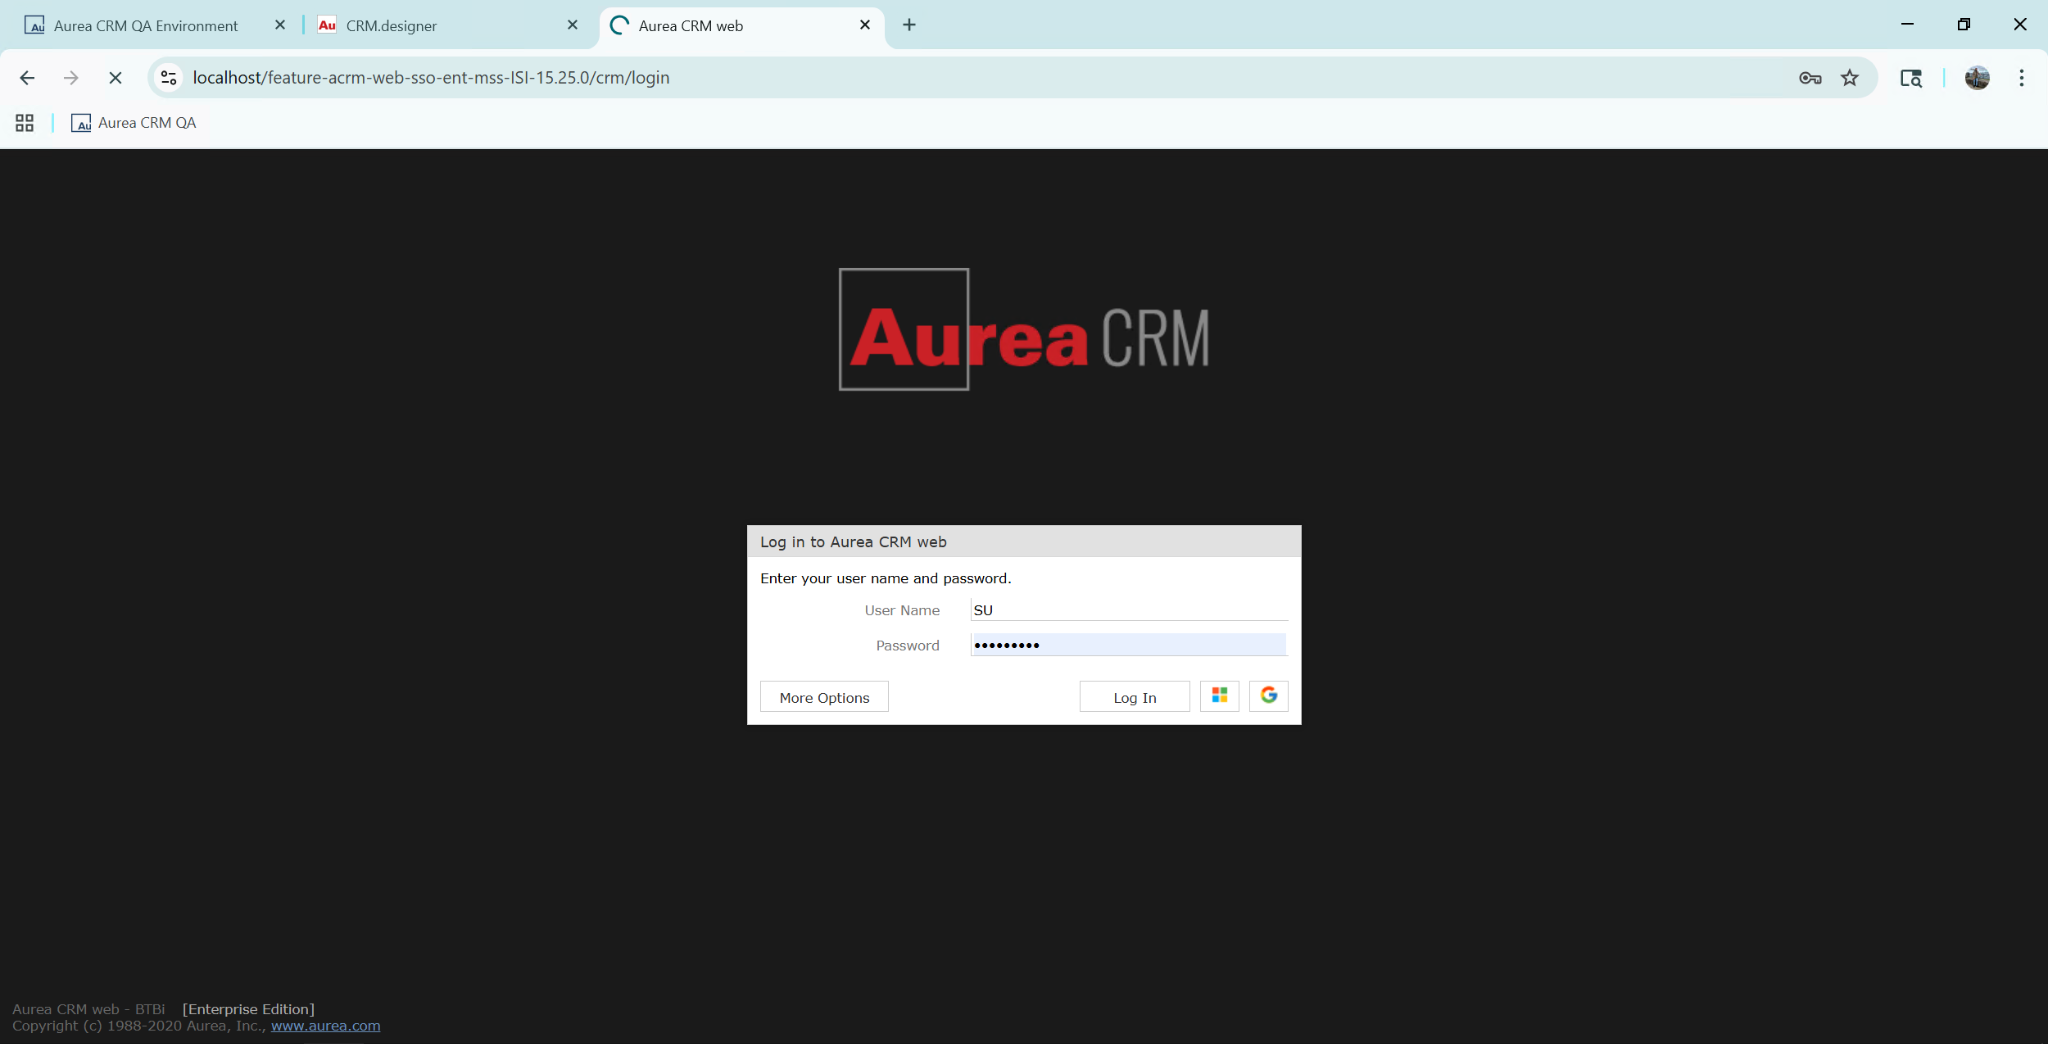
Notice that in both cases the two buttons are shown because I configured both. But you can opt in to configure only one. For example, Microsoft.
Csaba Daniel
Comments